I’ve had this crazy cold all week, so I’m sorry I haven’t been posting. I’ve pretty much been going to bed the second I get home from work. And then just moaning about how sick I am. So not really a lot of crafting, cooking, or organizing going on! I did make some homemade shower soothers so be on the lookout for another post on them!
Anyway, tonight I’m writing about making a scrubby coffee soap. When I started composting, I asked my parents to save their used coffee grounds. Little did I fully understand just how much coffee they drink! Way too much for me to use in my small garden. Anyway, I’ve been saying for a while now that I’d use some of the grounds to make an exfoliating soap and this week I finally got around to it. At its core, soapmaking is a really simple process. You just combine fats of your choosing with a strong base (typically hydroxide). The art is choosing how much of which fats you’ll want to use as well as any additions (essential oils, flowers, coffee grounds, etc.).
When it comes to choosing your oils, it’s helpful to look at already existing soap recipes. You’re going to want oils that provide several different characteristics: hardness, cleansing ability, ability to produce a thick lather, and creaminess all come to mind. To make this process easier, I suggest using the website SoapCalc. You can play around with amounts of different oils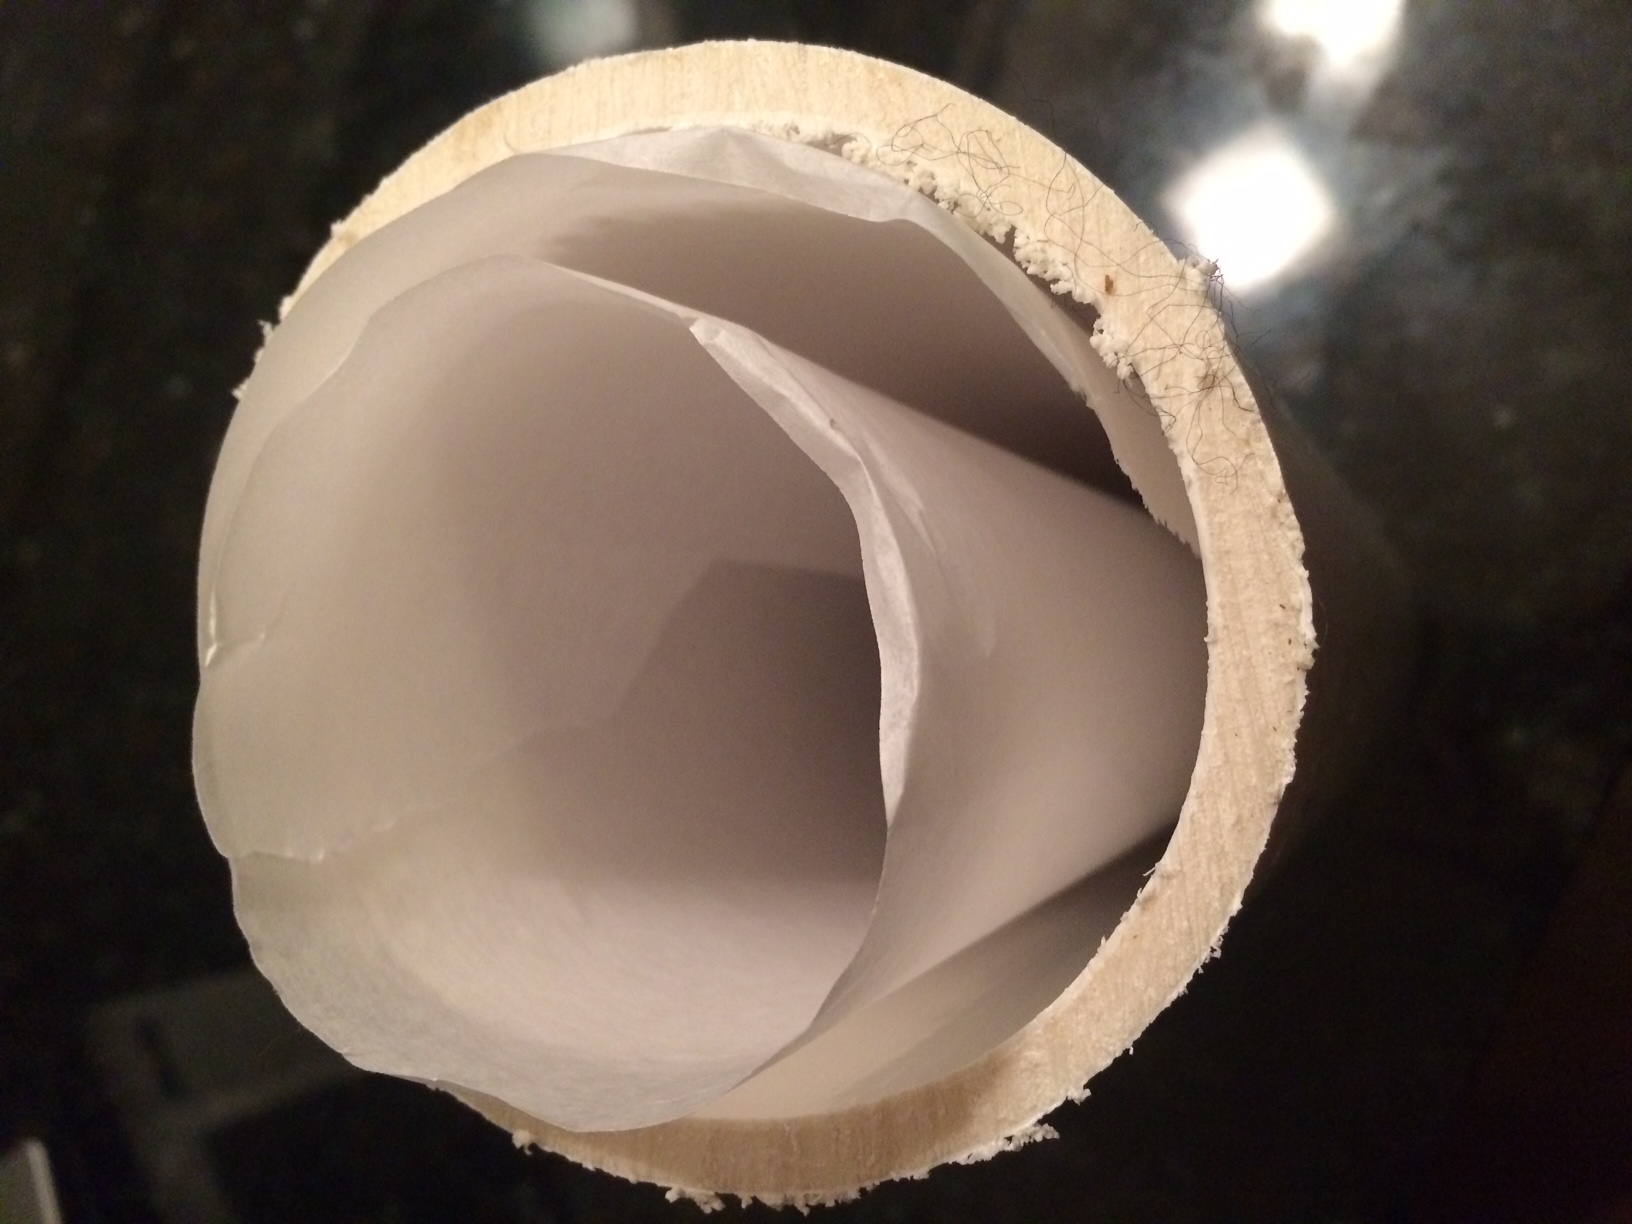 there to find the perfect combination for your needs. After that, the process is relatively simple.
I wanted to make round soap bars this time. The soap molds at your local craft store are great, but you really need to have several of those in order to have enough for even the small batch I made. So instead of using those, I used a PVC pipe. I bought a 60 cent cap for the pipe so that one end would be closed off and then lined the inside of my pipe with parchment paper. There are definitely plenty of people who don’t bother with the parchment, but I didn’t want to risk having a beautiful soap that was unusable because it was stuck inside a pipe. Once this ultra-chic PVC pipe mold is ready, you can get to measuring your reagents.
To the right you’ll see the recipe I printed out from the SoapCalc website (the first time I made this soap last weekend). That recipe will give you all the measurements for your soap. It’s important to note that these measurements are in weight and not volume. You’re definitely going to want a kitchen scale for this process. I foolishly got rid of my scale during one of my cabinet purges last year, so this time I made my soap without the aid of said scale. If you remember your basic chemistry calculations from high school, you can convert masses to volume if you can find the density of your oils. Anyway, I found most of my densities online (just not the Crisco shortening) so I just fudged that shortening volume. Dissolve your base (most likely lye) in water and put that aside. When the lye dissolves in water it gives off a decent amount of heat so be careful not to burn yourself. Also, you should be wearing gloves for this whole process as they lye is definitely caustic.
Once you’ve measured out your fats, you want to melt the fats on low to medium low heat on the stove. Once those are melted, add the oils and stir to mix. Remove from the heat and stir in the lye solution. It should start turning cloudy Here’s another place where I didn’t really have the necessary tools available. This process goes much quicker if you have an immersion blender, but mine broke a couple weeks ago and I haven’t had a chance to replace it yet. Anyway, if you have an immersion blender go ahead and give the pot a few pulses. You’re looking for the mixture to be at a point that soapmakers call “light trace.” That is a point where the mixture is decidedly thicker than it started out and the oil layer and water layer aren’t separating anymore. When doing this by hand you look for the point where you can drizzle some of the soap on top of the pot and it takes a couple seconds for the drizzled bit to sink into the rest of the pot. Because I was whisking by hand, this took about an hour. If I’d had the immersion blender it probably would have taken a minute or so. Anyway, about halfway through my whisking I decided that cinnamon and clove oils would smell nice with the coffee so I ran to my essential oils box and grabbed those oils. I added two to three drops of each and it smelled divine.
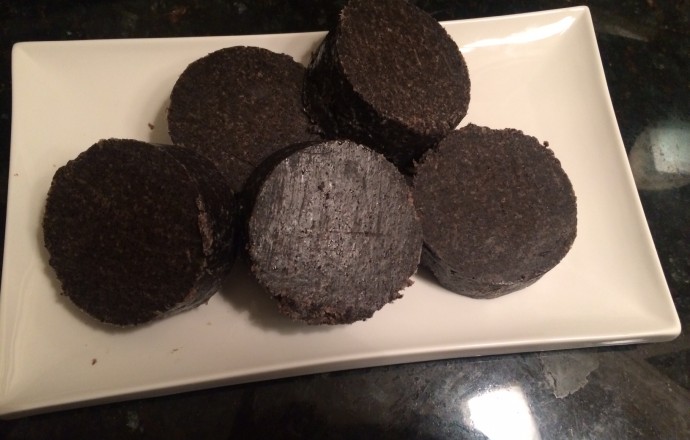
Once I’d finally reached trace, I added some coffee grounds. I was making a one-pound soap recipe and I think I added about a cup of the grounds. I just added until it looked like the soap would really do some scrubbing. From there, I just poured the soap into the PVC tube and let sit overnight. The next day I pushed it out of the tube and sliced it into bars. Easy.
I wasn’t happy with this first batch of the soap; it was a little too moisturizing. Okay, it was greasy. But the biggest problem  was that it was stinky! Really, really stinky! I brought it to work to see if even coffee lovers thought it was stinky, and they couldn’t believe they were smelling coffee. It smelled salty and foul. Just by chance, a former student who I knew to be a soapmaker passed by me in the hall so I had her smell it. She also didn’t know what the stink was so she asked me the recipe. When I told her I used olive oil she said she was sure that was the problem since olive oil soaps can have a strong smell. I didn’t really think the soap smelled like olive oil soap, but I didn’t have much else to try so I decided to try another batch without olive oil.
Almost a week later (that cold is a bitch!) I got around to trying a new recipe. This time I used a combination of shortening, coconut oil, canola oil, grapeseed oil, and sunflower oil. Again, I played with the amounts of each until I found a combination I liked in SoapCalc. This time I had a new kitchen scale and immersion blender. I chose this kitchen scale because I liked the range of measurements available. When you’re looking for a scale make sure you find one that can tell the difference between small quantities of a substance (e.g. 0.5 g vs 0.8 g) but also able to measure heavier items. You’re going to want to be able to zero on whatever vessel you’re using for weighing and it’s pretty convenient to measure directly in your pot. This time the process went a little smoother simply because I was able to measure the lye and shortening accurately. Plus having the im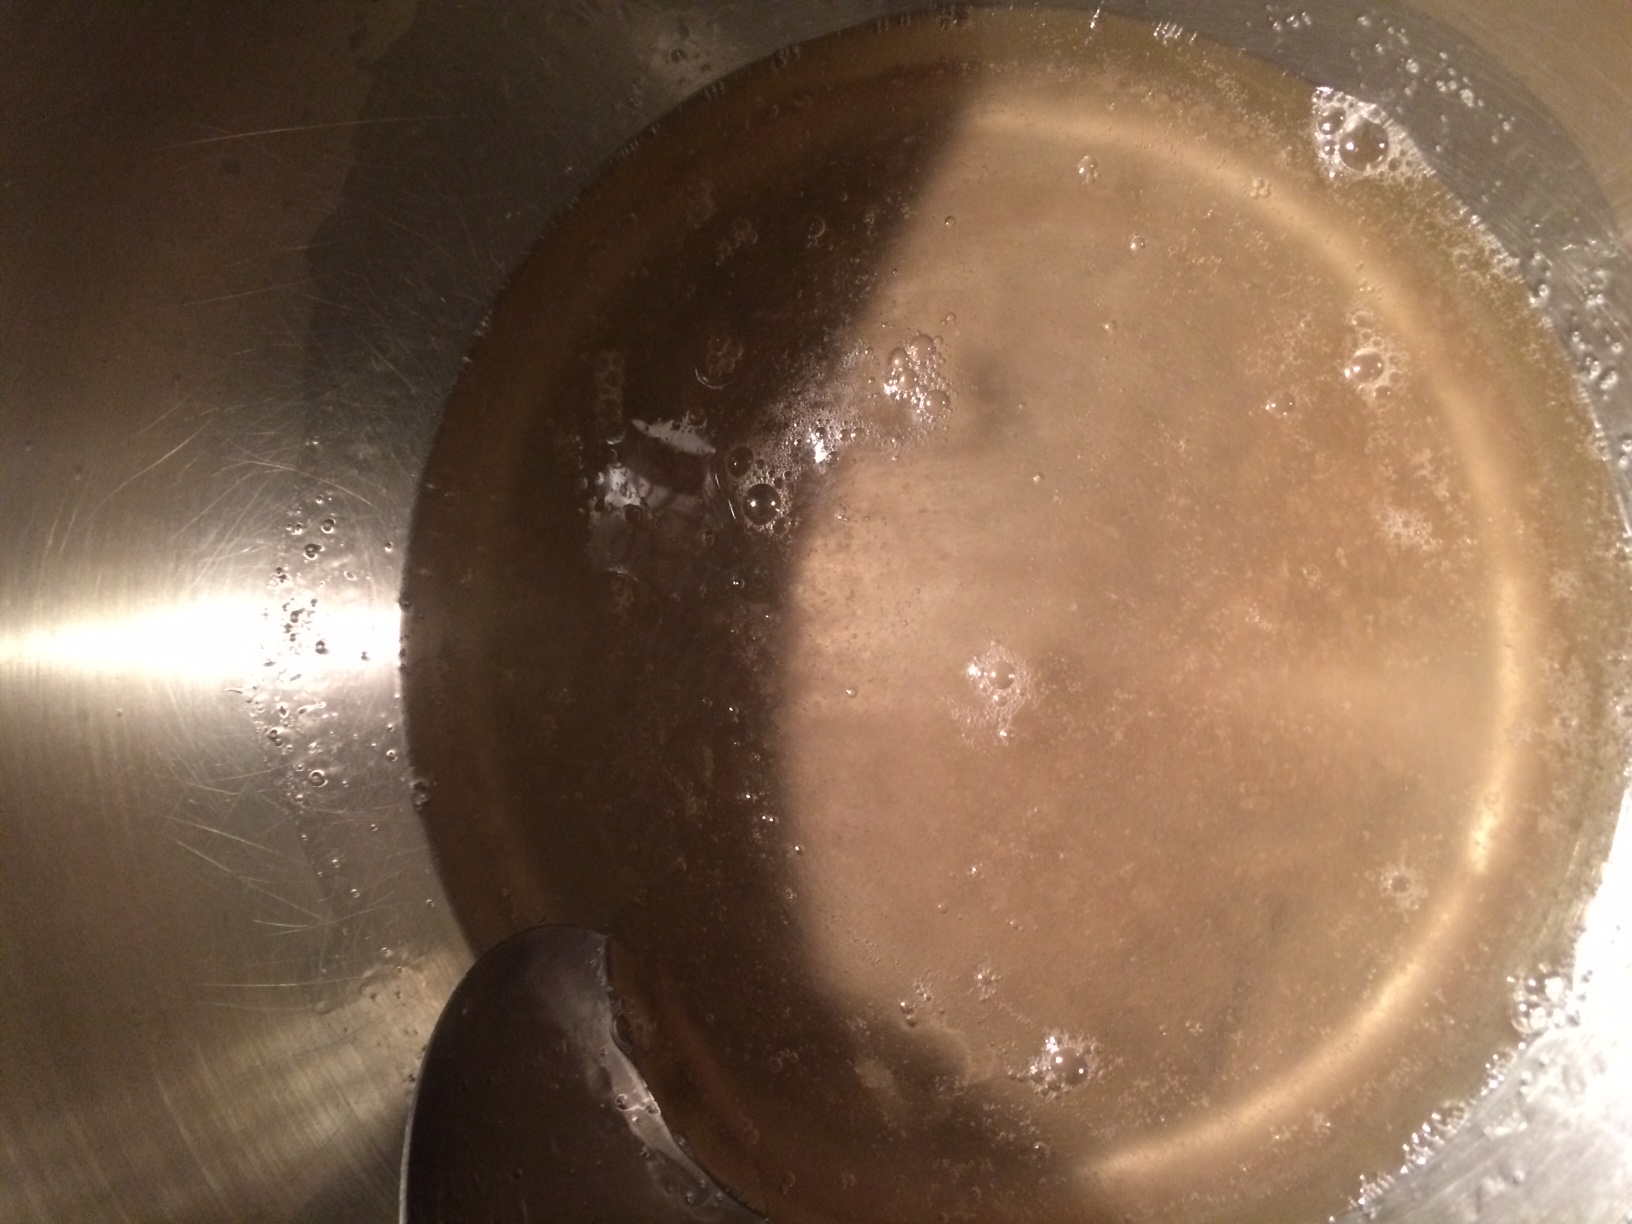 mersion blender sped up the process. I definitely recommend finding an immersion blender where the entire shaft is stainless steel. That way you don’t worry about blending a still-boiling soup. The model I ended up going with is also pretty great because the business end is dishwasher safe. My old one was kind of a pain to clean so this is exciting. And I didn’t actually notice that it was dishwasher safe until I got it home so it was also a surprise!
Back to the soapmaking, right? So I dissolved the lye in water and set it aside like before. Then I melted the shortening and coconut oil in my pot before adding the canola, grapeseed, and sunflower oils. Next I added the lye solution and stirred. The oil immediately turned cloudy. I pulsed for a few minutes with the immersion blender until I reached trace and then added two drops of cinnamon bark oil. I pulsed a few more times and then stirred in about a cup of my coffee grounds. And you know what happened? It immediately started to STINK. The smell was exactly like the old soap so I was pretty bummed. I still went ahead and poured it into the mold because I didn’t know what else to do.
But then I started to think. The old soap had been sitting on a plate on my counter all week because I hadn’t decided what to do with 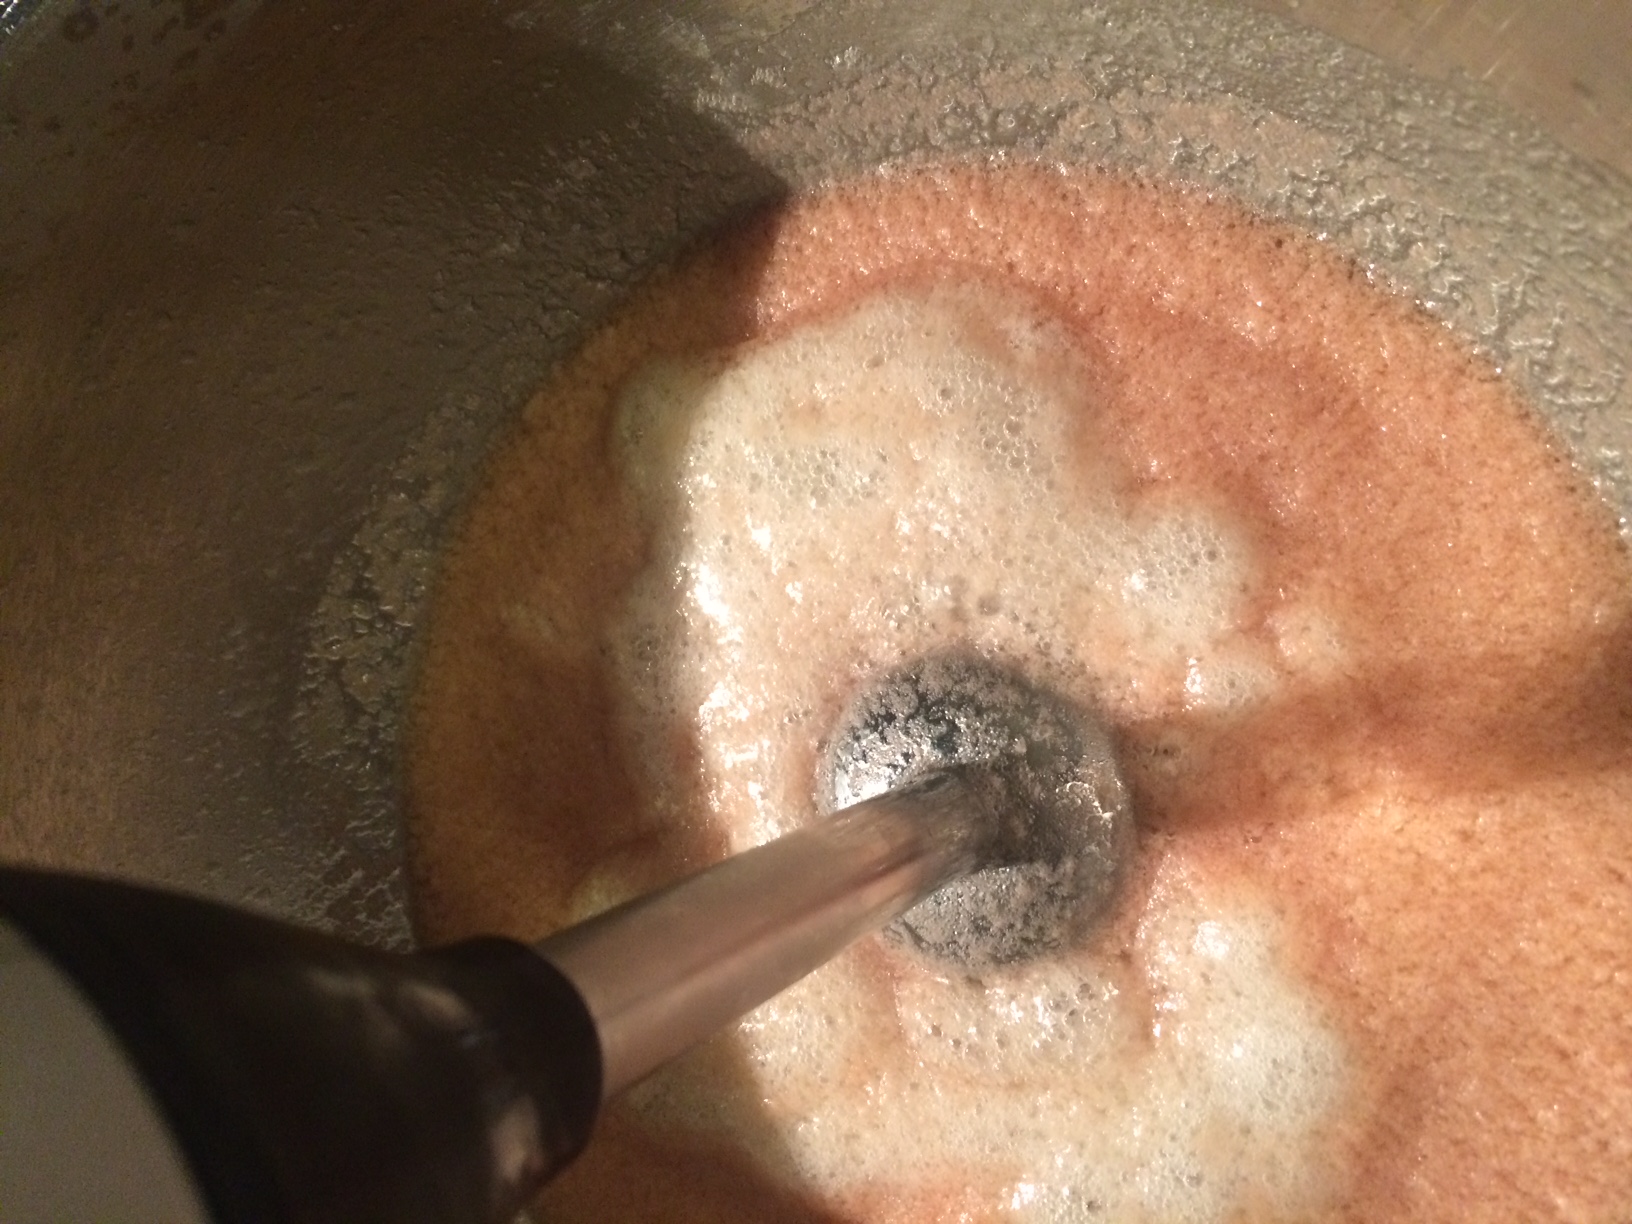 it. And my kitchen didn’t smell bad. The bar that I had brought to work smelled bad still, but it had been sealed in a Ziplock bag. I went over to the plate of soap and sniffed at a bar. Now it just smells like coffee. Still a stronger coffee smell than I prefer, but not like salty animal fat like it did before. So I’m pretty sure that the secret to not-stinky coffee soap is for it to air out a little. Or maybe it needs to cure in some way.
Exfoliating coffee soap
1/4 pound vegetable shortening
1/4 pound coconut oil
1/4 pound canola oil
0.15 pound grapeseed oil
1/10 pound sunflower oil
172 grams water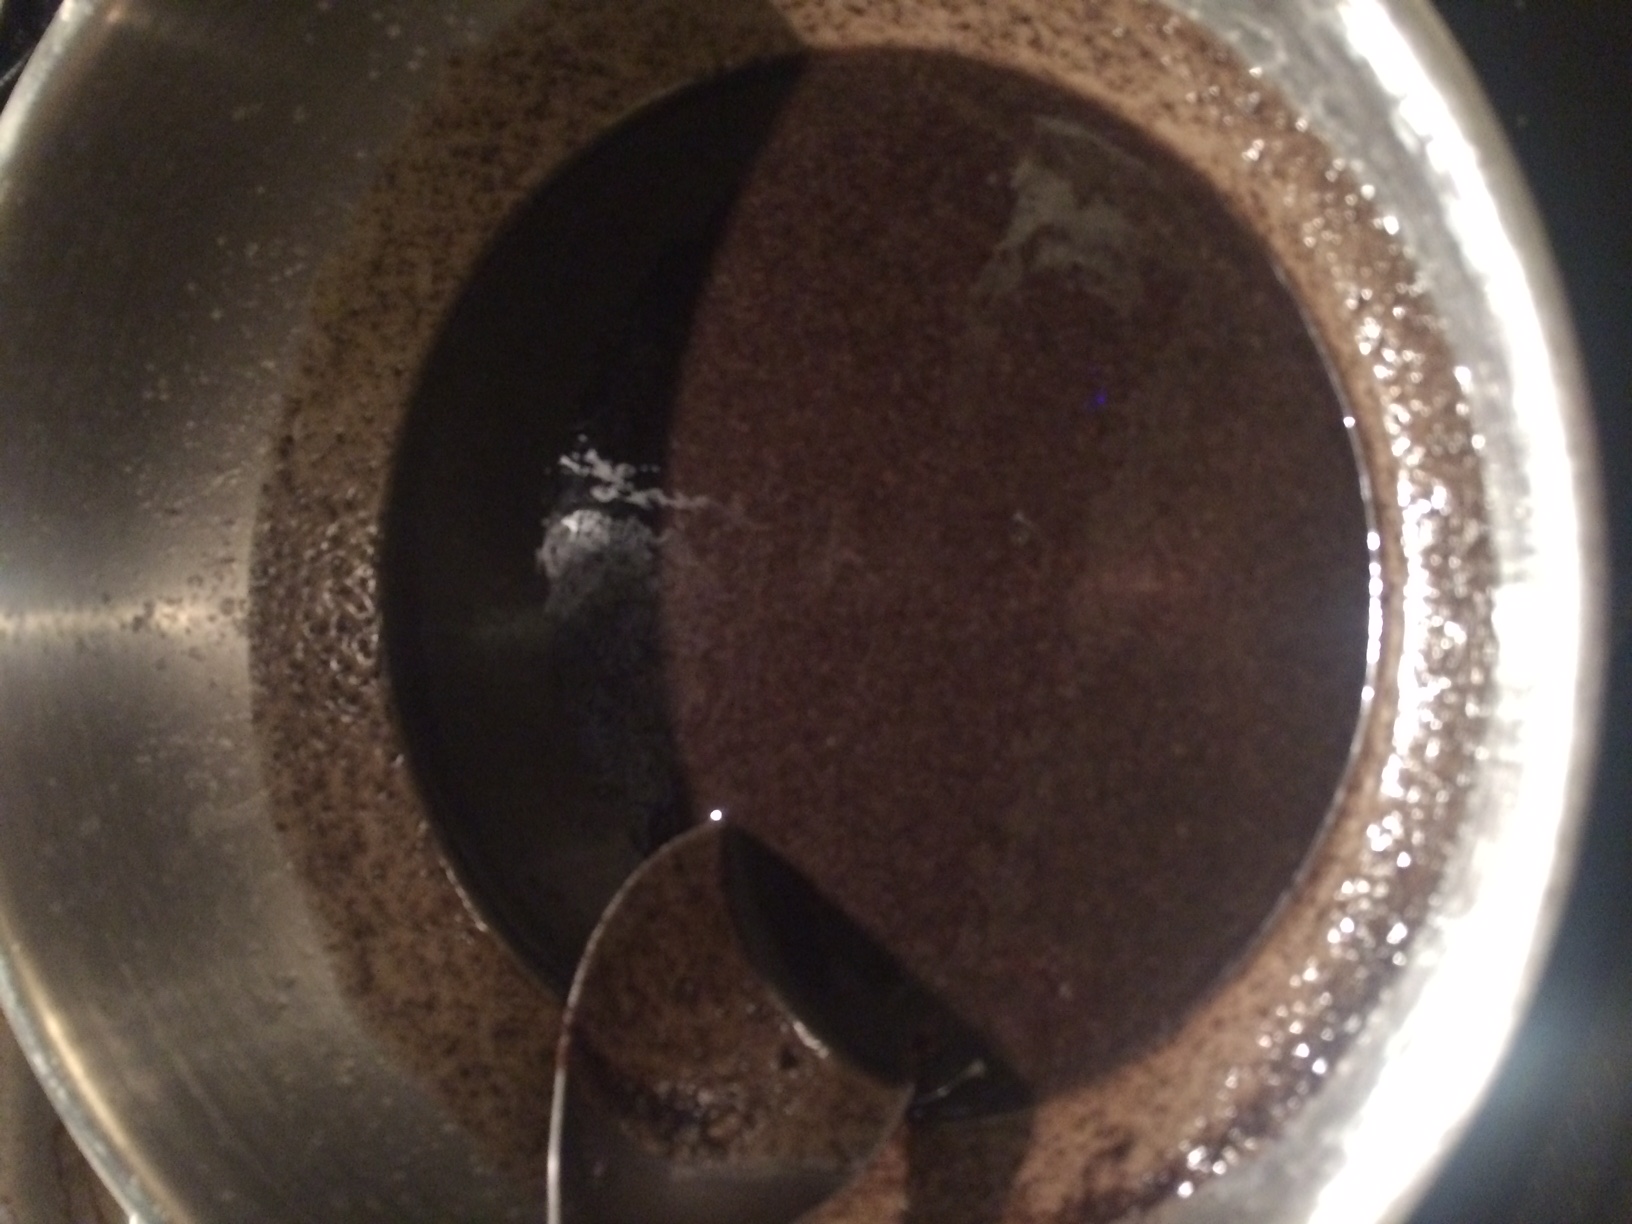
63.4 grams lye (I used a bottle of drain cleaner that was 100% NaOH because it was cheaper than buying lye from a craft store)
1-2 drops cinnamon oil
1/4 cup coffee grounds
Caution: lye is dangerous. Serial killers in movies use it to dissolve bodies, so you probably don’t want it on you. Or in your eyes. So wear gloves and safety goggles when working with it.
Dissolve the lye in the water and set aside to cool. Melt the coconut oil and shortening on the stovetop. Add the other oils and blend. Slowly add the lye solution and begin to pulse with an immersion blender. Once you’ve reached light trace, add 1-2 drops of cinnamon oil. Stir in the coffee grounds and pour into your mold. Let sit overnight. And then let sit for a week so it will stop stinking!
UPDATE
I used a bar in the shower just now and it was definitely too scratchy. I think a whole cup of coffee grounds was too much for a normal exfoliating soap. I’ve updated the recipe to say 1/4 cup of grounds. You might want to add even less. That said, if you want a soap to scrub dead skin off the soles of your feet then stick with the original 1 cup. I ended up using if for that and now my feet are really smooth.