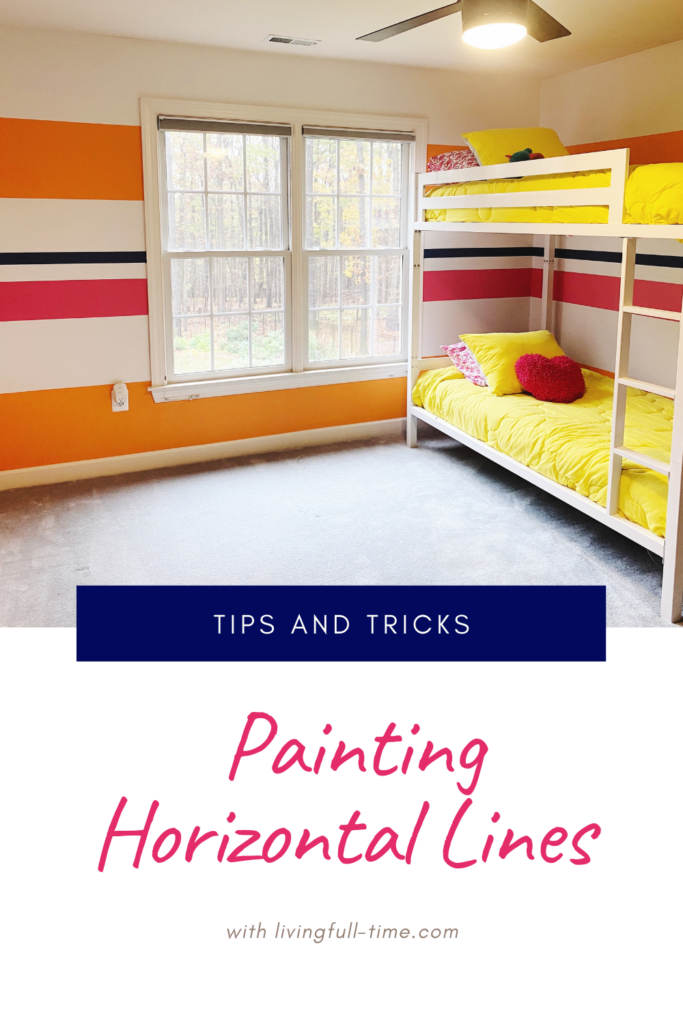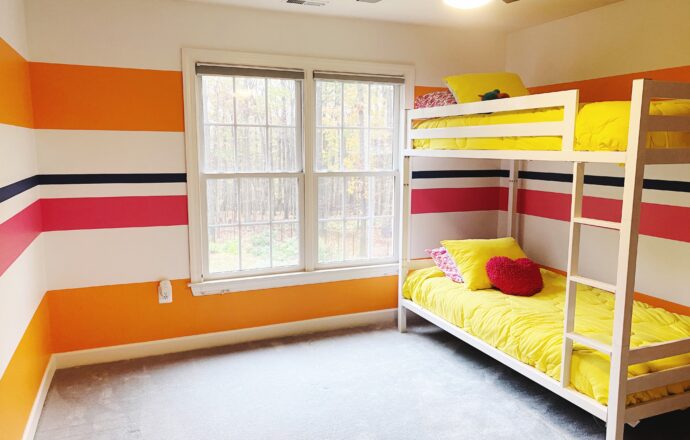
I’ve painted striped walls many times in my life and people are always asking how I get them “perfect.” First off, y’all know I don’t do anything perfectly. But after about the tenth person asked me how I painted one of my guest room’s walls (or asked me who I hired to paint them), I figured I’d get around to doing a tutorial on painting horizontal stripes. There are really only two secrets to “perfect” horizontal stripes on your walls: a laser level and painting in your tape.
The first thing you’re going to need to do is paint your walls a solid color. If your walls are already a color that will be used in your stripes, then you get to skip this step. My walls were a really dull yellowed beige that were not going to work with the crisp look I was going for, so I started by painting the whole room a cool white.
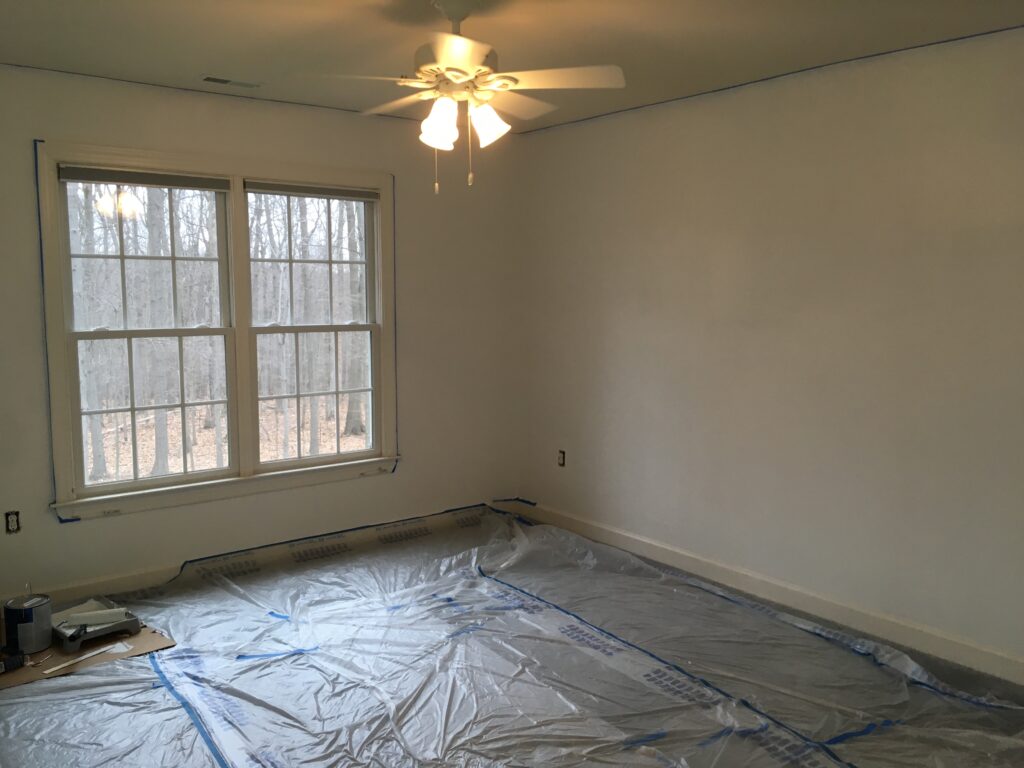
Yawn, right? Because you’re going to be using painter’s tape, now you need to wait at least 24 hours. That is the minimum drying time recommended when using delicate surfaces painter’s tape. If you don’t wait long enough, your tape will peel the base color off the wall. I like to wait at least a week. It’s easier to wait that long if you have a list of other projects to work on. Since this was the first room I painted when I moved in, I was more patient than usual.
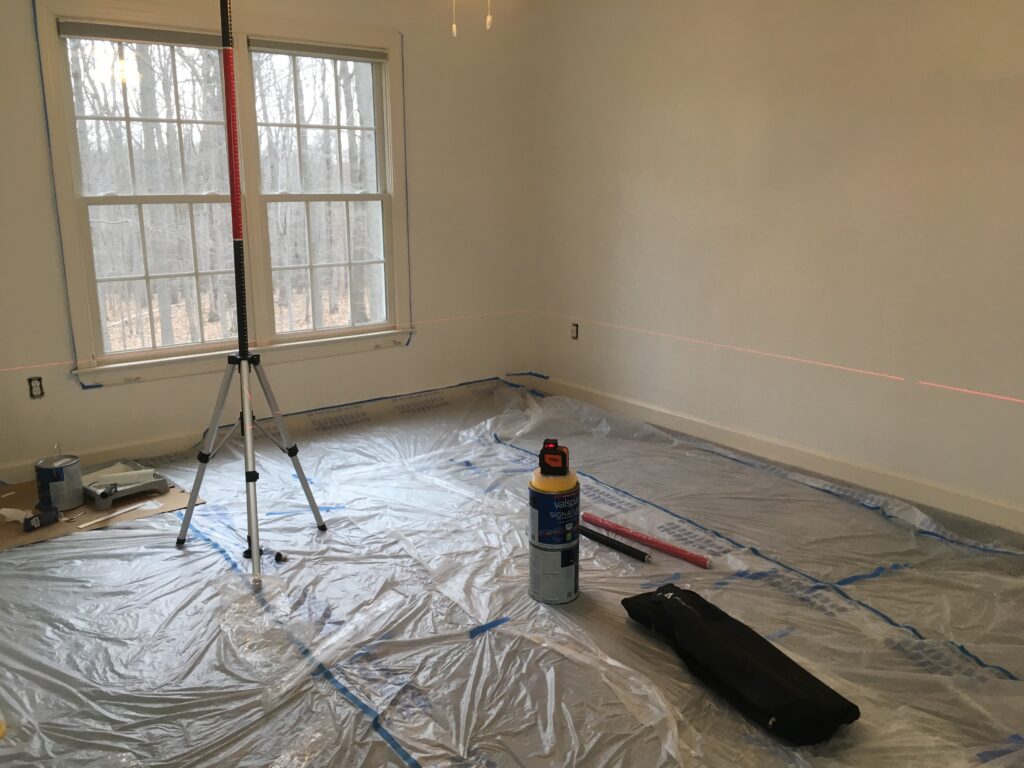
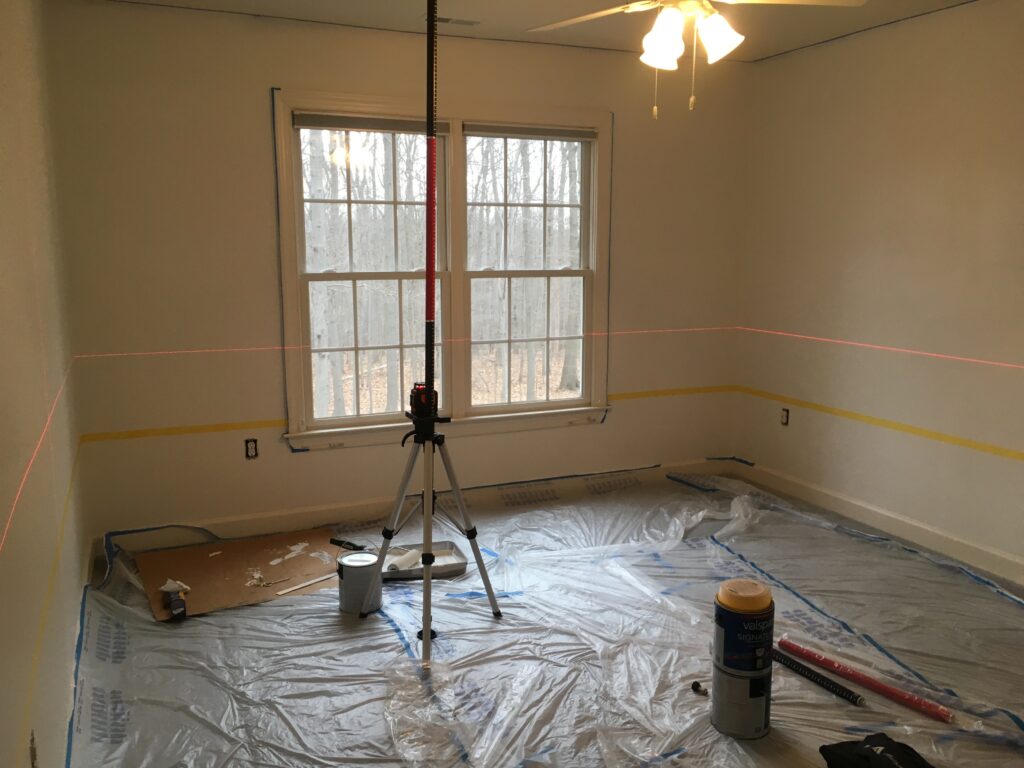
I do recommend some specialized tools for painting horizontal stripes: first, you need a laser level. You could technically do this with a regular level, but the laser level makes this really so much easier. With a regular bubble level you’d have to be much, much more coordinated than I. Fortunately, the price of laser levels has come down a lot since I first bought mine. This is definitely a tool that you’ll use often if you hang things like hooks or towel bars around the house.
Second, it’s also incredibly helpful to have one of these telescoping poles with a mount for laser levels. Again, you can try to get away with not using one of these pole mounts, but the specialized tool makes this so much easier. It’s really difficult to get your laser supported at exactly the right height you want it at, and the telescoping pole mount lets you do that.
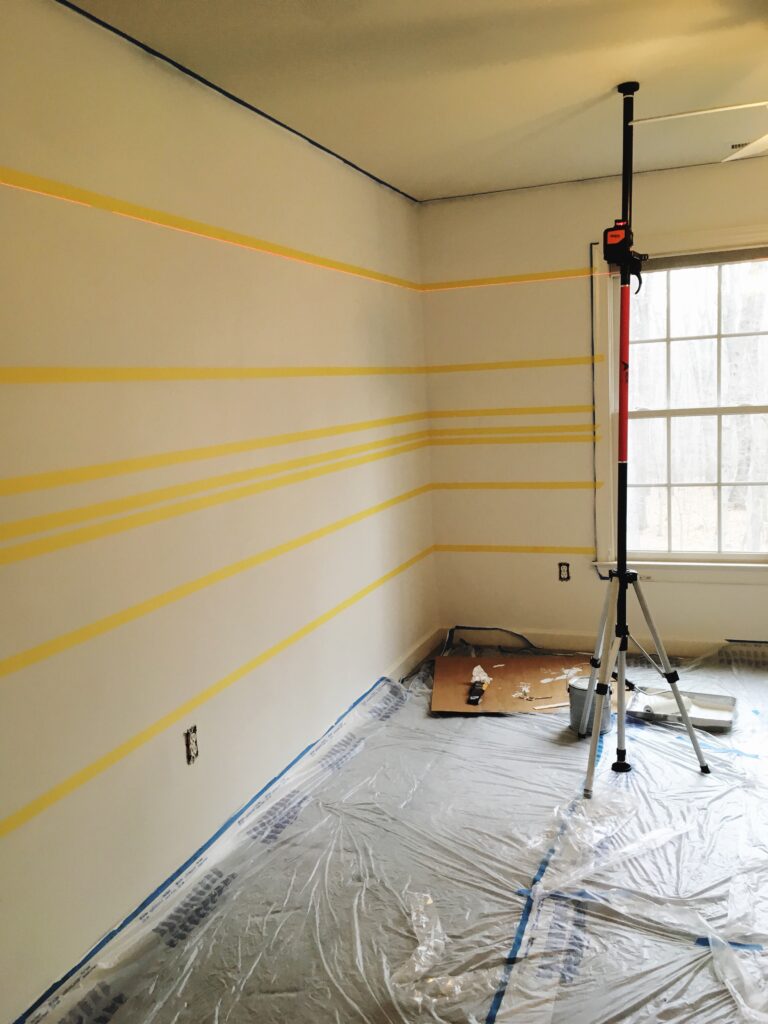
For my striped walls, I wanted stripes of different widths, so there was no measuring to do. I just eyeballed it. The only thing I knew that I wanted for sure was for the bottom stripe to be a color and for the top stripe to be white. If you want stripes of regular widths across your whole wall, you’ll want to measure the distance from your baseboard to your ceiling (or moulding). To determine the width of each stripe, you’ll divide that distance by the number of stripes you want.
When you’re ready to place your first strip of painter’s tape, set up your laser level.
Carefully place your tape along the laser line. Because I was going with irregular stripes, it didn’t matter whether I placed the tape above or below the line. If you’re painting regularly-spaced stripes, you’ll want to alternate whether your tape is above or below the line.
You’ll just keep moving up the wall until you’ve taped off all your stripes.
When I decide I want to paint a room, I can be really impatient to start getting my color(s) up on the wall. So this next step sucks, but it’s soooooooo necessary.
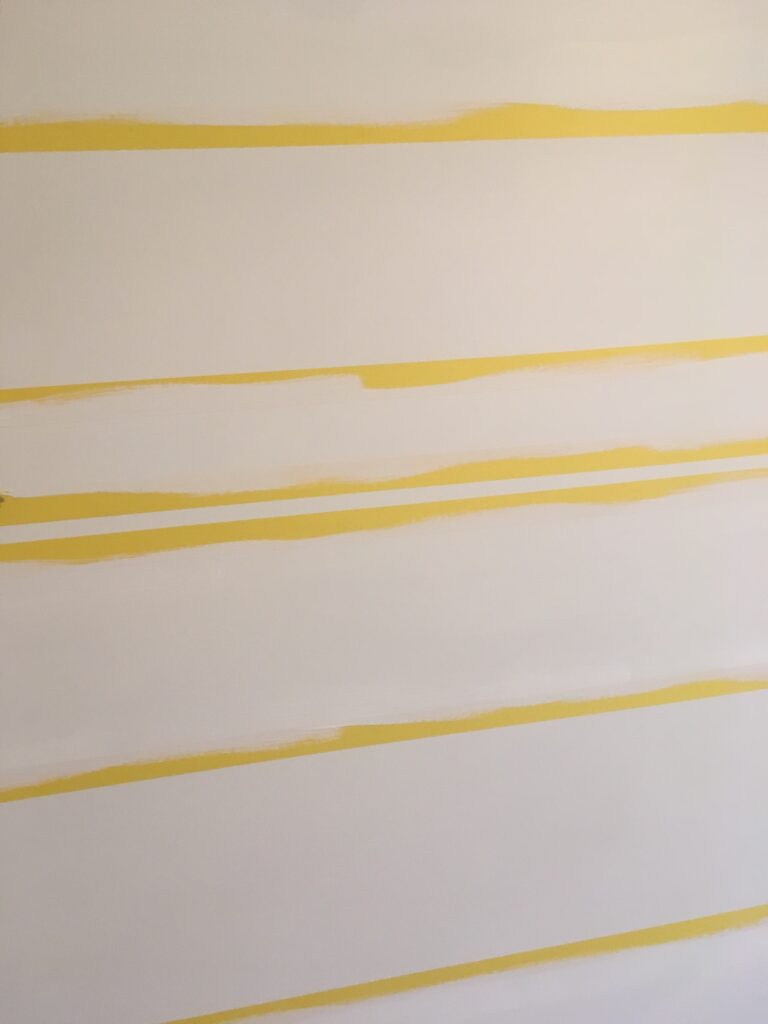
You have to paint over the edges of your tape with the color that is already on the wall.
If you’ve ever painted over tape before, I’m sure you’ve seen how you can get a little feathery bleeding under the tape. The smoother your wall, the less you’ll notice this but it will still be there. No matter how great your tape is. No matter how carefully you press your tape to the wall. It will be there.
Because my base color was white, I painted white paint over the tape. The white paint definitely bled under the tape, but I’ll never see it. What it does for you is fully block your later coats from bleeding.
You stop the bleeding by preemptively bleeding. (Definitely not medical advice)
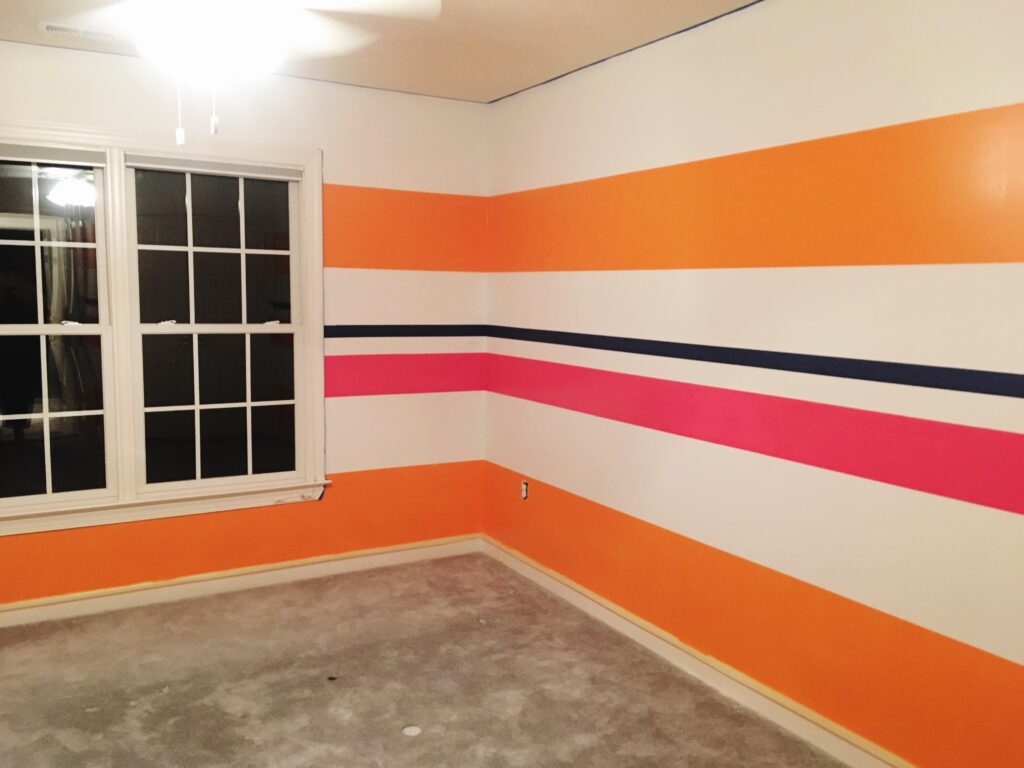
The reason I hate that step though is that it adds to my wait time. I only have so much patience! But I know it’s necessary, so I wait. Luckily for this coat you only need to wait an hour or so. Then you can get painting! I was using orange, hot pink, and a touch of royal blue.
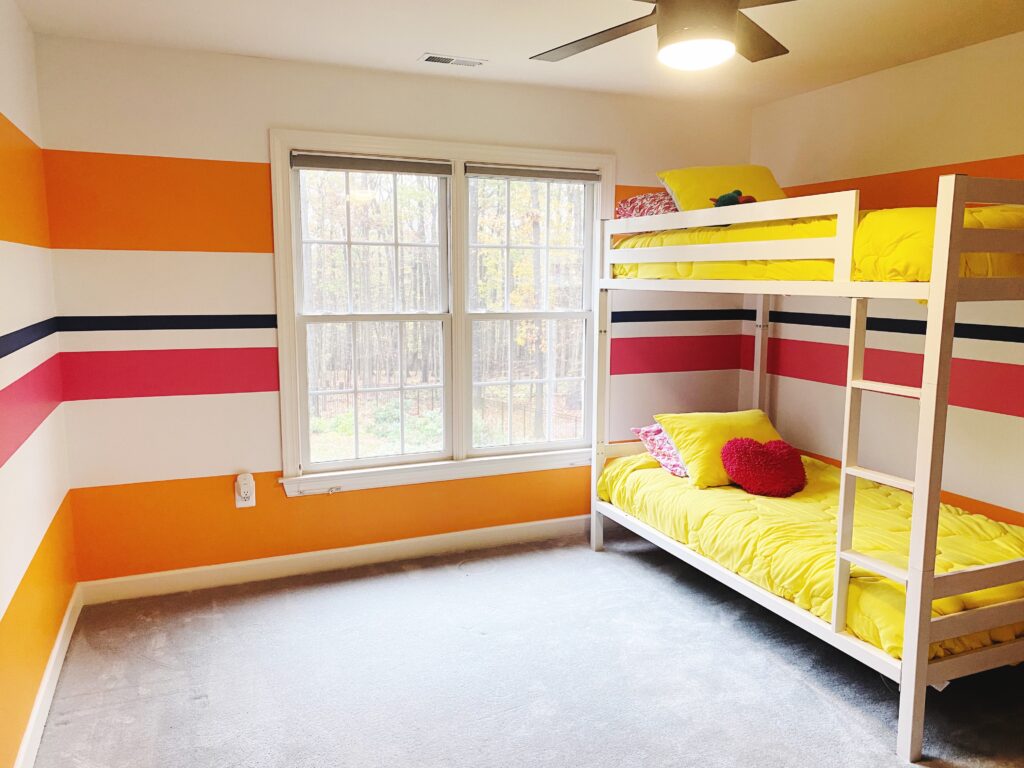
This was always supposed to be a guest room for kids, so I bought a bunk bed online. Y’all will laugh, but I liked the yellow painter’s tape so much with the colors of my stripes that I went and found quilts that were the same shade of yellow.
That’s it! It’s really not a difficult DIY at all. If you can paint a wall, you can paint stripes.