Okay, so I let myself go two weeks without posting again. But I kind of feel like Conan O’Brien about this because it’s not like this is my job, man. I’d love to say I hadn’t posted because I was being soooo productive in life, but not so much. I’ve been incredibly lazy, all because of seasonal affective disorder. I hate the summer so much, guys. The days are so long and I just can’t fall asleep until 1 or 2 in the morning. I’m only really happy when I wake up around 5 AM, so I have to choose between 3 or 4 hours of sleep every night or sleeping in and then feeling like a lazy shit.
But wait! There’s a secret third option!
I go to bed between 1 and 2 and still wake up between 4:30 and 5. Then I walk and feed LucyLou, watch TV or read because I’m simply too tired to do anything else, and nod off for ten minute intervals until I absolutely must wake up. Not great. And when I’m not sleeping well I get depressed, y’all! And then I just want to veg out in front of the TV at night because 1) depression and 2) exhaustion. This isn’t the best way to get stuff done! I still need to make sure the house is ready to sell, though. When I get the call saying I can start my Big Girl Job™, I’ll be putting this place on the market!
I’m pretty much done with all my major projects, but as I mentioned in my last post I have a dining room window that needed dressing. Now if you saw my Christmas post, you’re not going to believe me but I’m kind of a minimalist when it comes to my home decor choices. I like clean lines and very bold colors. And I really, really, REALLY don’t like fussy window treatments.
We spend so much money on windows; why cover them up?
Now, I recognize that there are times when we do need to worry about privacy with windows: the giant window over my bathtub comes to mind. But in general I like naked windows. That said, my dining room window MUST have some sort of screening because of the spectacular view . . . of the neighbor’s trash cans. (For the record, I’m not complaining about my neighbors putting their trash cans there because it’s where they belong.) Until recently this hadn’t really bothered me. When I moved into the house there were sheers and drapery panels up and I have cared so little about that window that I just left them (even though I always thought the look was too fussy for me). I had to take down those curtains to paint recently and lo and behold, I have a pretty nice looking window there!
Plus, I feel like undressing that window made the room feel HUUUUGE, Man!
Unrelated aside: do any of you remember Tiny Elvis on Saturday Night Live? I say HUUUUUGE, Man way more than I guess I should (or the perfect amount) and no one knows what I’m doing.
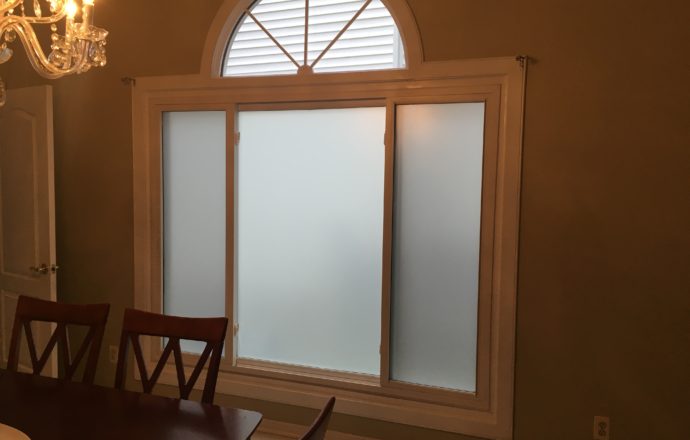
I wanted to keep this clean look but still mask the trash cans. Sure, I had some options. I think a think honeycomb shade inside the frame would be nice, but I’m not looking to spend a couple hundred dollars dressing this window. So I decided to apply window film to give the window a frosted look without the commitment of actually etching the glass.
Window Film Application
Okay, so I want to apologize right now for the following: I didn’t take enough pictures. In my defense, once you start this project you really need both hands at all times. I thought about calling my Mom, but she was not sold on this idea at all. She thought that the idea of frosted windows was horrible in every application outside the bathroom (she might well be correct; she often is).
Materials
- Window film
- Window film application solution
- A straight-edge to smooth the film
- A cutting tool
- Scissors
Now first off, I put links in that material list because I know that some people might not live really close to a hardware store. But for everyone else, you can just go to Lowe’s for this. Plus that way you can see all the other window films available. I know there was a mirrored option because I accidentally bought that for the side panels of this window and had to take that back. And there was definitely a tinted window option for those of you with rooms that get too much sun.
The first step in this project is to really thoroughly clean your windows. Obviously if there’s any crud on the surface of the window, that crud is going to be stuck between the glass and the film as long as you leave the film up! You’re also going to wet the surface with the application solution. I was surprised during this process how frequently I needed to spray that solution. Prepare to be spraying every few seconds! Next you need to cut the film to be a little bit bigger than your window. Cutting it exactly to size means that you have to be 100% perfect as you apply, and I found that I was far from perfect as this (so about as perfect as I am in anything). You’re basically putting up a giant sticker that you can’t remove and reapply. And since this is a sticker, you need to remove the protective backing.
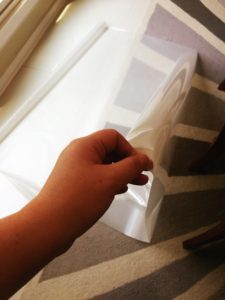
In the picture, you can kind of see that I’ve peeled apart the frosted sticker from the clear backing. The way you do this is kind of fun. Take two pieces of tape (I used packing tape because that’s what I had handy). You’ll stick the tape on both sides of the material and when you pull the pieces of tape across, the backing comes off the film. It’s like magic!
Once you start removing that backing, you’re going to want to start spraying that application solution on the adhesive side of the film. It’s so damn sticky that this is the only thing that saves you from getting it all stuck together. Ask me how I know. The instructions are very clear that the manufacturer thinks you should remove all of the backing before you apply it to the window. Good luck with that. That was just impossible for me, but maybe it works out if you’re doing this with a friend?
I removed about the top foot of the backing and went ahead and applied the exposed portion to the window. Next, I smoothed out the top several inches of that exposed area so that it was well adhered to the window.
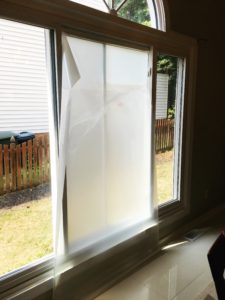 From here on, I didn’t have time to take any pictures. My hands were just too busy keeping this going. You’re going to want to slowly remove backing while spraying the film with the application solution, smoothing out the film as you work your way down the window. Once you’ve applied the film to the entire window, use the cutting tool to slice the film along the perimeter. Then carefully remove the trimmings, leaving a nice frosted window!
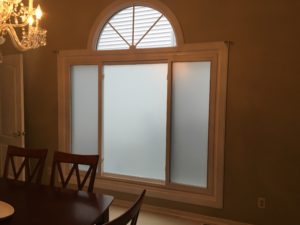 I learned a few big lessons during this project.
First, maybe it’s not so bad to have another person around the house. I’ve lived alone since 2002 (with the exception of a combined total of 8 moths of temporary roommates) and when I see recommendations to have a second person help you with a project I just think “help is for the weak.” Help would have been great with this, at least for the larger center window.
Second, IT IS SO DAMN HARD TO TAKE PICTURES OF WINDOWS!!! The above picture makes my dining room look so dark, but it’s such a bright room!
